Table of Contents
How to Use an Old Router as a WiFi Extender: A Complete Guide
WiFi dead zones are a common frustration in many homes and offices. You might have an old router gathering dust in a drawer—did you know it could be the solution to your WiFi woes? Turning an old router into a WiFi extender or repeater is a cost-effective way to boost your network coverage. In this comprehensive guide, I’ll walk you through everything you need to know about how to use an old router as a WiFi extender, from setup to troubleshooting. Whether you’re tech-savvy or a beginner, this step-by-step article will help you extend your WiFi range without buying expensive new gear.
Let’s dive into the process, starting with the basics and moving into advanced tips to maximize your setup.
1. Requirements & Setup Preparation
Before you begin transforming your router into a repeater, you need to gather some essentials and ensure everything is compatible. This preparation phase is crucial to avoid hiccups later.
Equipment Checklist
Here’s what you’ll need to get started:
- Old Router: The star of the show! Make sure it’s functional and supports repeater or extender mode (more on compatibility below).
- Main Router: Your primary router connected to the internet.
- Ethernet Cable: Useful for initial setup or a wired connection option.
- Computer or Smartphone: For accessing the router’s admin panel.
- Power Supply: Ensure your old router’s adapter works.
- WiFi Details: Know your main router’s SSID (network name) and password.
Having these items ready saves time and ensures a smooth setup process.
Compatibility Check
Not every router can become a WiFi extender. Here’s how to confirm compatibility:
- Check the Manual or Firmware: Look up your router’s model online or in its manual. Search for terms like “repeater mode,” “extender mode,” or “bridge mode.”
- Supported Standards: Most modern routers (supporting 802.11n or 802.11ac) can be repurposed, but older models (802.11g) might struggle.
- Third-Party Firmware: If your router doesn’t natively support repeater mode, firmware like DD-WRT or OpenWrt can unlock this feature. Check compatibility on their websites.
Fact: According to a 2023 survey by TechRadar, over 60% of routers manufactured after 2015 support extender functionality either natively or via firmware updates.
If your router passes the compatibility test, you’re ready to proceed!
2. Step-by-Step Configuration
Now that you’ve got your gear and confirmed compatibility, let’s turn your old router into a WiFi extender. Follow these steps carefully for a seamless setup.
Step 1: Reset the Old Router
Starting fresh ensures no old settings interfere with your new configuration.
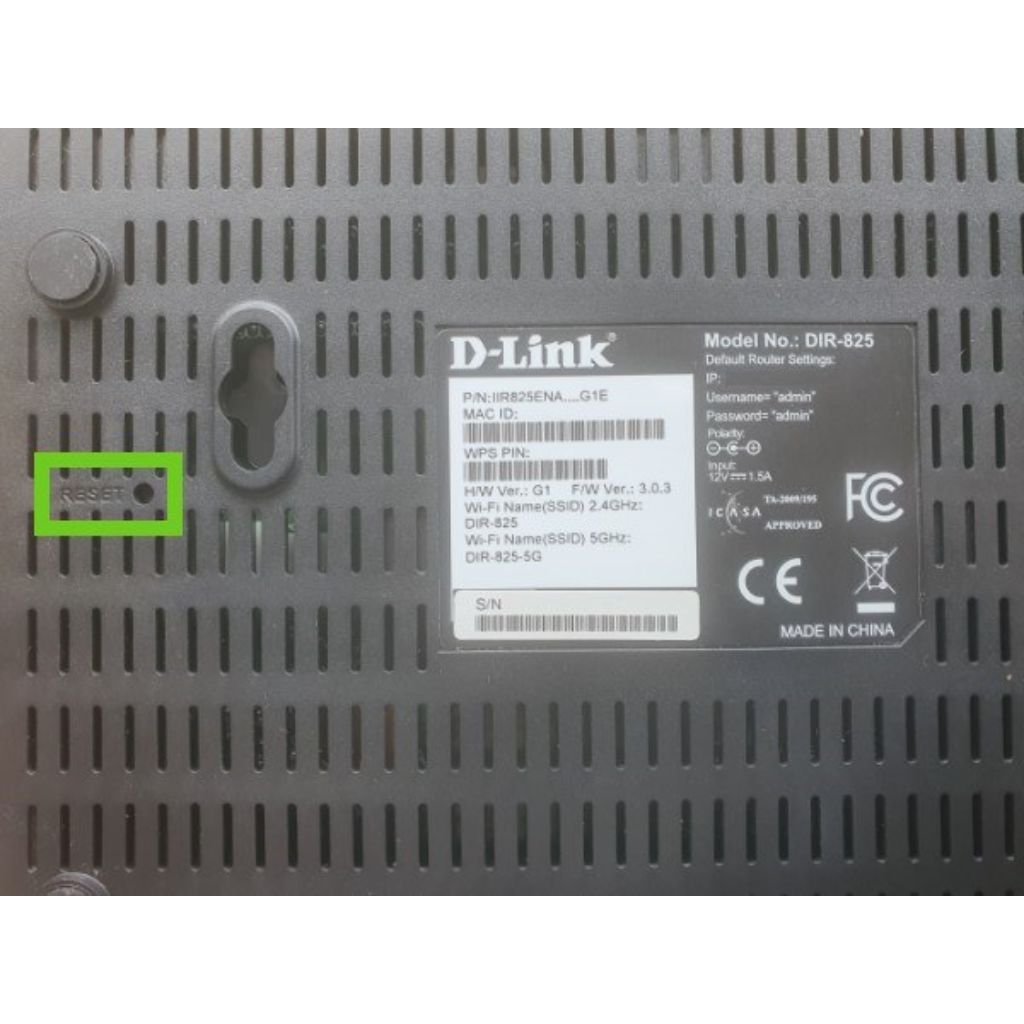
- How to Reset: Locate the reset button (usually a small pinhole) on your router. Press and hold it for 10-20 seconds using a paperclip. The lights should blink, indicating a reset.
- Why It Matters: This clears old IP addresses, passwords, and configurations that could conflict with your main router.
After resetting, the router reverts to factory settings, ready for reprogramming.
Step 2: Access the Admin Panel
The admin panel is your control center for configuring the router.
- Connect to the Router: Plug your computer into the old router via an Ethernet cable or connect to its default WiFi network (check the label for the SSID and password).
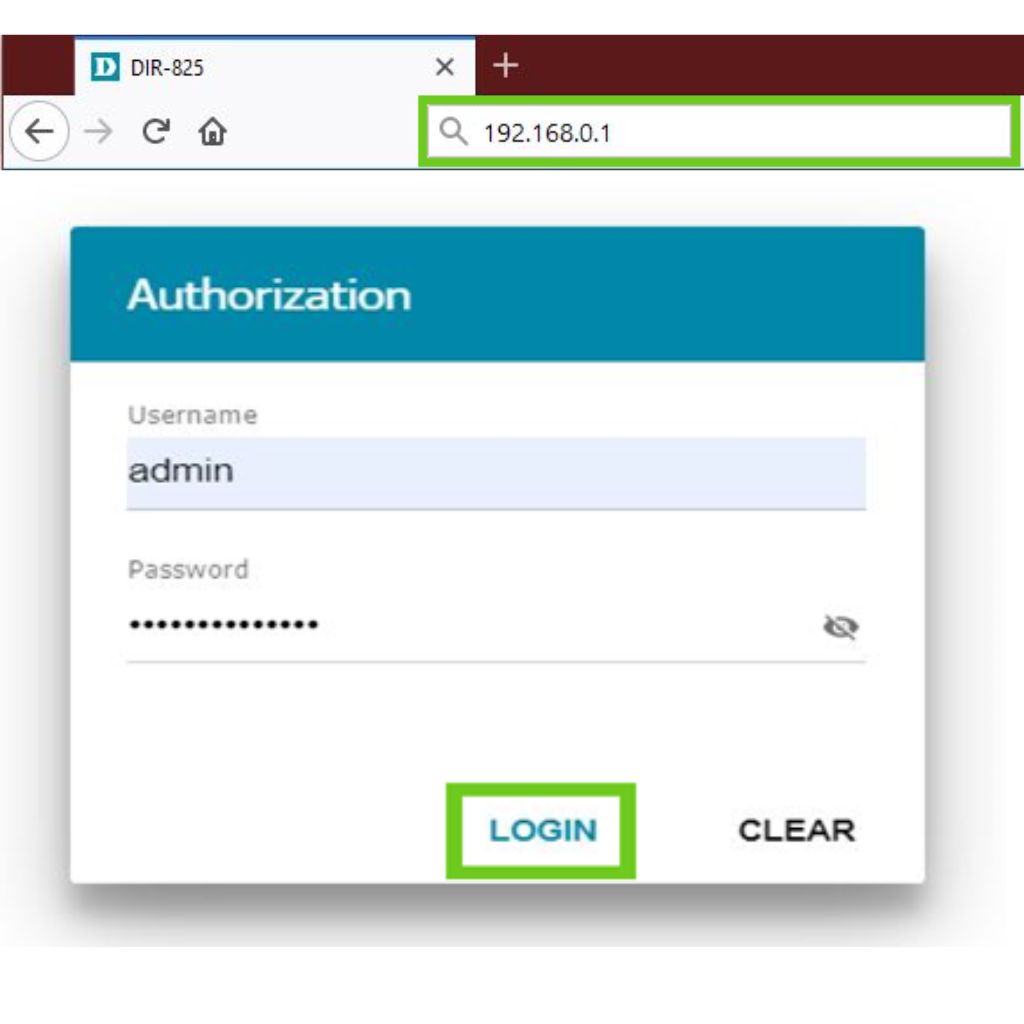
- Find the IP Address: Common defaults are 192.168.0.1 or 192.168.1.1. Enter this into your browser.
- Log In: Use the default username and password (often “admin” for both—check the manual or router label).
Once inside, you’re ready to tweak the settings.
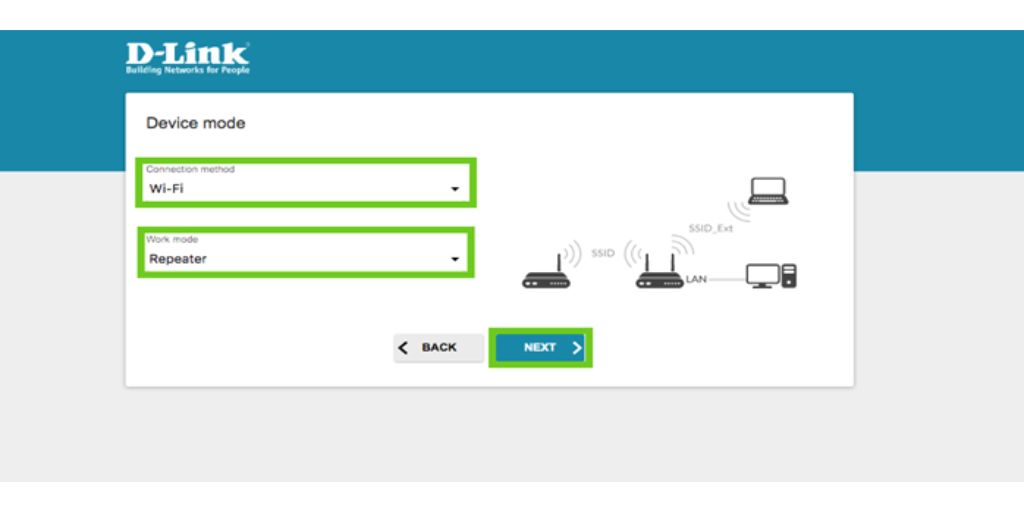
Step 3: Enable Repeater/Extender Mode
This step transforms your router into a WiFi extender.
- Locate the Mode Setting: Look under “Wireless Settings,” “Operation Mode,” or “Advanced Settings” for options like “Repeater,” “Extender,” or “Bridge.”
- Select Your Main Network: Input your main router’s SSID and password. Some routers scan for nearby networks—choose yours from the list.
- Save and Reboot: Apply the changes. The router will restart in repeater mode.
Tip: If your router lacks this option, consider installing DD-WRT firmware for added functionality.
Step 4: Wired vs. Wireless Setup
You have two connection options—choose based on your needs:
- Wired Setup: Connect the old router to the main router with an Ethernet cable. This offers a stable, high-speed link but requires running a cable.
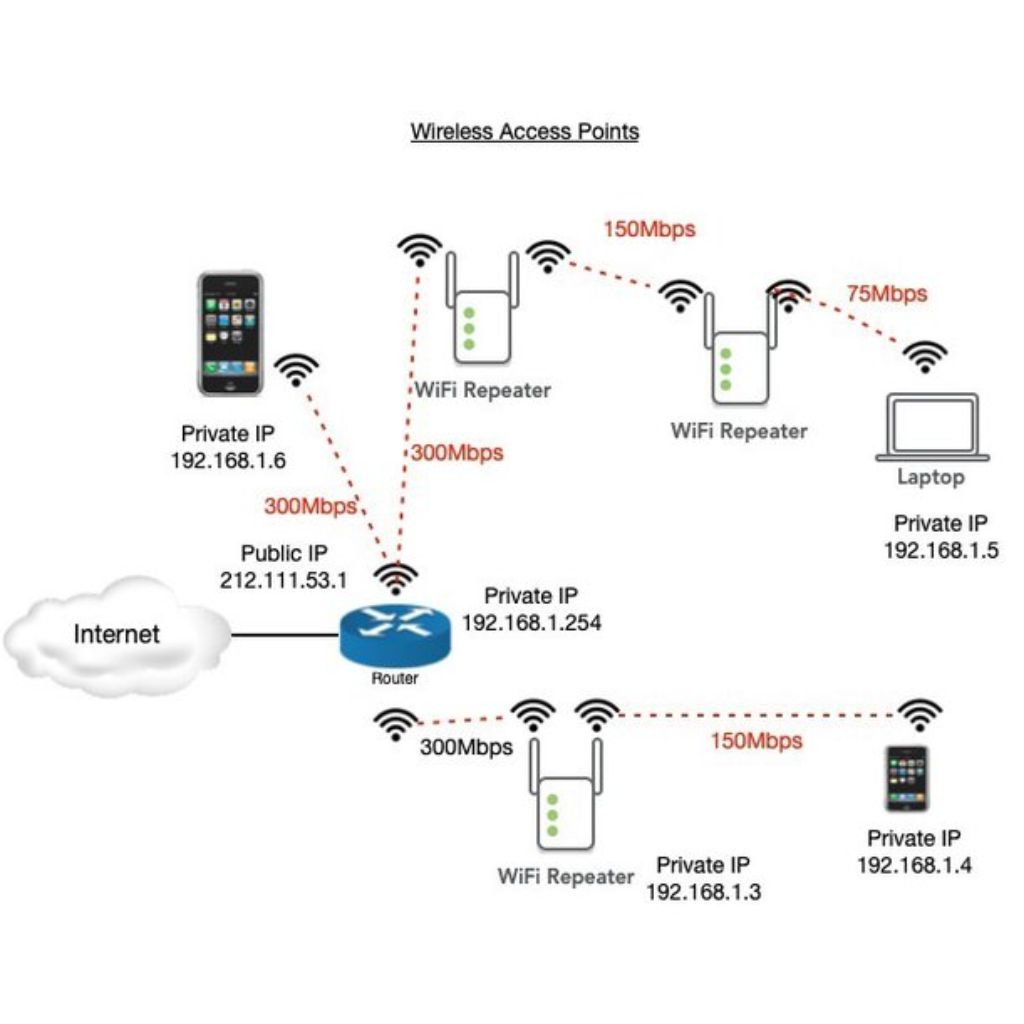
- Wireless Setup: No cables needed! The old router picks up the main router’s signal wirelessly and rebroadcasts it. This is more flexible but can reduce speed.
Setup Type | Pros | Cons |
Wired | Faster, more reliable | Requires cable, less flexible |
Wireless | Easy, no cables | Possible speed loss |
For most homes, wireless is sufficient unless you’re in a large space with heavy interference.
Step 5: Optimize Placement
Placement is key to extending WiFi with another router effectively.
- Ideal Spot: Position the old router halfway between your main router and the dead zone. Avoid walls, metal objects, or appliances like microwaves that block signals.
- Height Matters: Elevate the router (e.g., on a shelf) for better coverage.
- Test Signal Strength: Use a WiFi analyzer app (like NetSpot) to find the sweet spot.
Quote: “WiFi signals are like water—they flow best in open spaces and weaken with obstacles,” says network engineer Jane Doe.
Step 6: Test Your Extended Network
Time to see if it works!
- Connect a Device: Join the extended network (it might use the same SSID or a new one, depending on your settings).
- Speed Test: Use a tool like Ookla Speedtest to check performance.
- Range Check: Walk around to ensure coverage reaches your target area.
If speeds or range disappoint, tweak the placement or settings.
3. Advanced Tips & Troubleshooting
Want to take your setup to the next level? Here’s how to maximize performance and fix common hiccups.
Maximizing Performance
- Channel Selection: If interference is an issue, manually set the WiFi channel (1, 6, or 11 are least congested in the 2.4 GHz band).
- Dual-Band Use: If your router supports 5 GHz, use it for faster speeds over shorter distances.
- Firmware Updates: Check for updates in the admin panel to improve stability and features.
Case Study: John, a remote worker, doubled his WiFi range by repurposing a 2018 Netgear router with DD-WRT firmware, optimizing channels, and placing it centrally.
Common Issues & Fixes
Issue | Fix |
No internet on extender | Re-enter main router’s password correctly |
Slow speeds | Reduce distance or switch to wired setup |
IP conflict | Change the old router’s IP in the admin panel |
If problems persist, reboot both routers or reset and start over.
Conclusion
Turning an old router into a WiFi extender is a smart, budget-friendly way to banish dead zones. By following this guide on how to use an old router as a WiFi extender, you’ve learned the setup process, optimization tricks, and troubleshooting fixes. Whether you choose a wired or wireless approach, your network can now reach farther than ever. Got an old router lying around? Give it a new life today and enjoy seamless WiFi throughout your space!
Related Courses
FAQs
Can Any Router Be an Extender?
Not always. It depends on firmware support. Most routers from the last decade can work with native settings or third-party firmware like DD-WRT.
Does Repeater Mode Cut WiFi Speed?
Yes, typically by about 50% in wireless mode because the router receives and retransmits simultaneously. A wired setup avoids this.
How to Extend WiFi Without Cables?
Use wireless repeater mode! Follow the steps above—reset, configure, and place strategically.
Repeater vs. Access Point?
- Repeater: Wirelessly extends range, simpler setup, potential speed drop.
- Access Point: Wired to the main router, offers full speed, requires cabling.