Adding your WordPress site to Google Search Console (formerly Google Webmaster Tools) is an important step in SEO optimization.
Google Search Console provides specific webmaster tools that can be used to assist website owners in monitoring and maintaining their search presence and rankings.
This guide will help you add and verify WordPress sites in Google Search Console, also known as Webmaster Tools.
How do you add your WordPress website to Google Search Console easily?
What’s Google Search Console?
Google Search Console is a Google tool that allows website owners to monitor the presence of their site in search results.
It allows you to track your site’s search rankings and keeps you informed about any errors, security problems, or indexing issues that could affect your website’s performance in search.
WordPress SEO is something you should seriously consider. You need to add it to Google Webmaster Tools from day one.
Follow the images to add a search console to WordPress
Table of Contents
Step 1: Log on Google Search Console
You first need to go to the Google Search Console website. Click on the “Start Now” button.
Start Google Search Console
Next, sign in to your Google / Gmail Account.
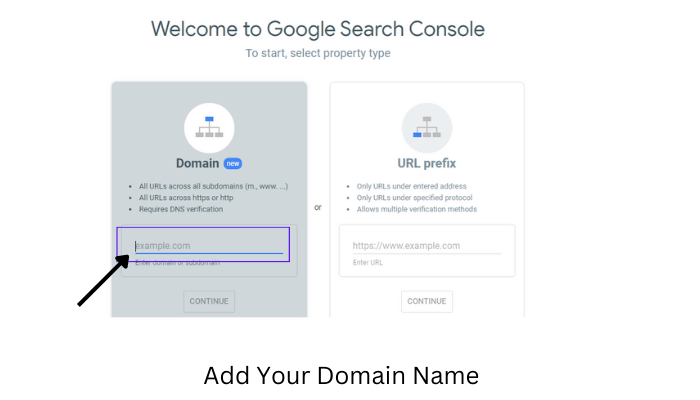
After logging in, you will be asked for your website URL.
Site verification can be done in two ways: URL prefix or domain name. Because it’s more flexible, we recommend using the URL prefix method.
Enter the URL of your website that WordPress uses.
There is an easy way for you to determine the URL that you must enter if you aren’t sure. Log in to your WordPress admin and navigate to Settings >> General.
You will find your website URL in the site address box.
Copy the site address from WordPress settings page. Once you have entered the correct website address into Google webmaster tools setup wizard click the “Continue” button to move on to the next step.
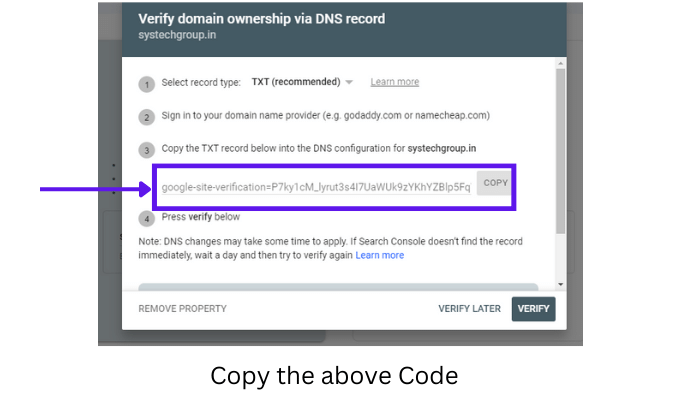
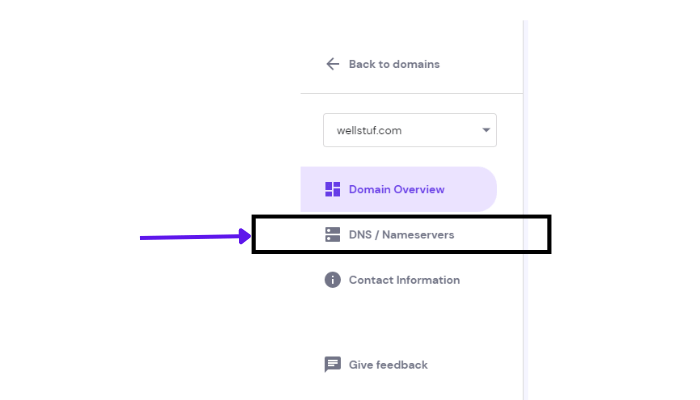
Step 4: Paste the Verification code in DNS records
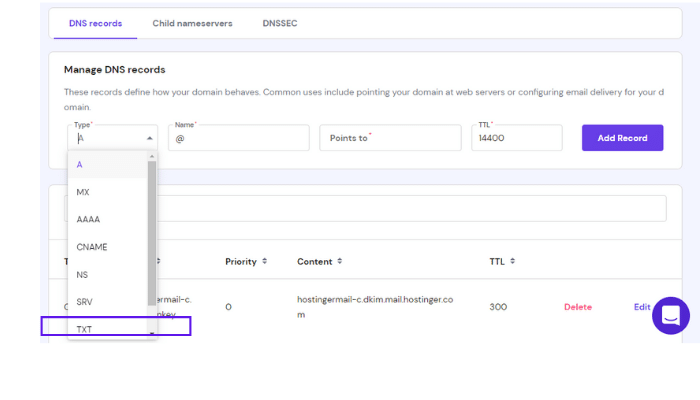
After clicking the Type Down arrow Button, they may several option you may get, please select the TXT option in that and paste your copied code in points table area.
After clicking in Add Record it will activate in one or two days.
Your website was successfully added to Search Console :
Notification: If you do not see the success message, you will need to clear your WordPress cache. This will allow Google to fetch the most recent version of your website.
That’s all. Your site has been successfully added to the Google Search Console (Webmaster Tools). To visit your Google Search Console dashboard, click the “Go to Property” link.