
By Arjun Kumar, Senior Trainer, Systech Group 15+ years in Network Security and Cloud Architecture · Updated November 2026.
9 min read
In short
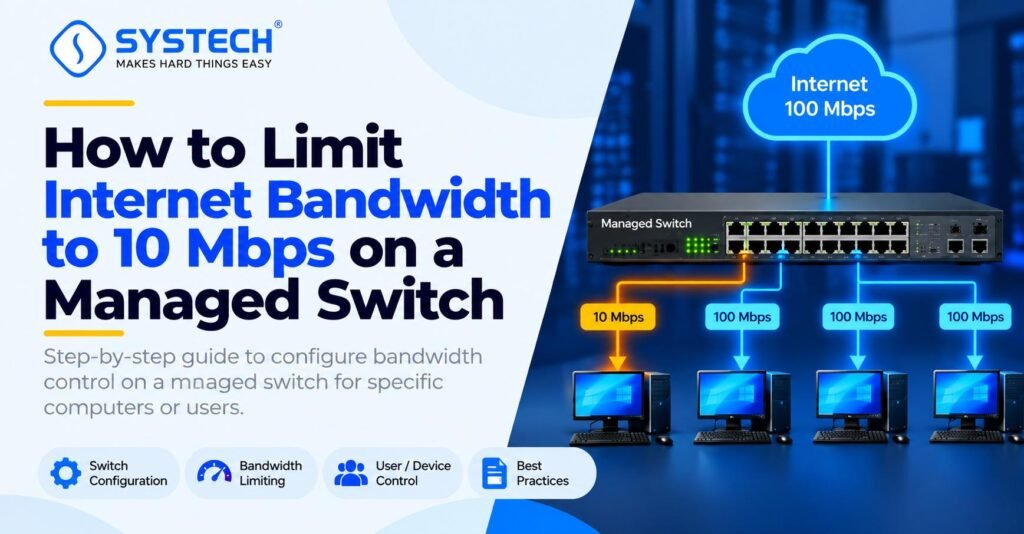
To limit internet bandwidth to 10 Mbps on selected computers, configure ingress and egress rate limiting on the corresponding ports of a managed switch. This helps control upload and download traffic while allowing other systems to use the available 100 Mbps internet connection. First, identify the correct switch ports, set the bandwidth limits, save the configuration, and test the speeds. The exact settings depend on the switch model and its supported features. If multiple computers share one switch port, a port-based limit controls their combined traffic rather than giving each computer a separate 10 Mbps limit.
Table of Contents
Introduction
Imagine a company has a 100 Mbps internet connection shared by 20 computers. Most employees need normal internet speed for their daily work, but a few computers use too much bandwidth for large downloads, software updates or video streaming. The network administrator wants to limit those selected computers to 10 Mbps without installing a firewall.
This can be done on a managed switch that supports port rate limiting or bandwidth control. The administrator can configure a maximum data rate for the switch ports connected to the selected computers. The other computers can continue using the available network bandwidth, subject to the internet connection and other network limits.
If you are learning how switches, routers and network traffic work, the practical concepts covered in a CCNA course in Chennai provide a useful foundation for understanding this type of network configuration.
This guide explains which feature to use, how to configure a 10 Mbps limit, how to test the result and which mistakes to avoid.
What Is Bandwidth Limiting on a Managed Switch?
Bandwidth limiting is a network feature that controls how much data can pass through a port during a given period.
A managed switch allows an administrator to control and monitor network ports through a web interface or command-line interface (CLI). On supported models, the administrator can set an ingress rate limit, an egress rate limit, or both.
For example, a switch has a 100 Mbps internet connection and four selected computers. If each computer is connected to a separate access port, the administrator can configure a 10 Mbps limit on each of those ports.
These values are an example, not a guarantee that every computer will receive its full configured speed. Actual speed depends on internet usage, the router, the switch and other network conditions.
Rate limiting vs QoS vs storm control
These terms are related, but they do different jobs.
For this scenario, start with port rate limiting, not storm control. Vendor documentation distinguishes ordinary bandwidth control from storm protection.
How to Limit Selected Computers to 10 Mbps on a Managed Switch
The following procedure explains the general process. Menu names and supported settings vary by manufacturer.
Step 1: Identify the computers and their switch ports
First, identify which switch ports connect to the computers that need a bandwidth limit.
For example:
- Computer A – Port 3
- Computer B – Port 4
- Computer C – Port 5
- Computer D – Port 6
Use the switch’s MAC address table, connected-device list or port-status page to confirm the connections. Do not assume that a computer is on a particular port without checking.
If the selected computers connect through a separate unmanaged switch, configuring the uplink port will limit the combined traffic of all devices behind that uplink. It will not automatically give each computer an independent 10 Mbps limit.
Step 2: Log in to the managed switch
Open the switch management IP address in a browser, or connect using the supported CLI method.
Sign in with an authorised administrator account. Before making changes, record the current configuration or save a backup if the device supports it.
Step 3: Open the bandwidth control settings
Look for a menu with a name similar to one of these:
- QoS → Bandwidth Control
- Traffic Management → Rate Limit
- Ports → Ingress/Egress Rate
- QoS → Traffic Shaping
The correct menu depends on the switch. TP-Link’s Easy Smart Switch guide, for example, uses QoS → Bandwidth Control to set ingress and egress rates on selected ports.
Step 4: Set the selected ports to 10 Mbps
Select the ports connected to the computers that need the limit.
Set the ingress and egress rate to 10 Mbps, where both options are available. Some interfaces use Kbps rather than Mbps, so check the displayed unit before entering a value.
Example configuration
Illustrative settings for a switch that supports per-port bandwidth control.
Leave other ports unchanged unless they also require a limit. Do not apply these example values to the uplink port, which carries traffic for multiple devices.
Step 5: Apply and save the configuration
Click Apply or Save. Some switches immediately activate the settings, while others require the running configuration to be saved to startup configuration.
Confirm that the selected ports show the correct rates and that no unrelated port settings have changed.
Step 6: Test the internet speed
Run an internet speed test on each selected computer. If possible, test both upload and download speeds.
Then run the same test on an unrestricted computer connected to a different port. This helps confirm that the restriction applies only to the intended devices.
Remember that a 10 Mbps rate limit is a maximum traffic rate, not a promise that every test will show exactly 10 Mbps. Protocol overhead, congestion and the speed-test server can affect the result.
Configure a 10 Mbps Limit Using the Switch CLI
Some managed switches support bandwidth configuration through a command-line interface. The exact syntax differs by vendor and model.
The following example is based on the command format documented in the TP-Link TL-SL3428 V3 CLI manual. It illustrates how ingress and egress rate limits may be set on an individual port.
TP-Link
TP-LINK(config)# interface ethernet 3
TP-LINK(config-if)# port rate-limit ingress 10000 egress 10000
In this example, the rate values are expressed in Kbps, so 10000 represents 10,000 Kbps, or approximately 10 Mbps using decimal units.
Important: Treat this as a model-specific example, not a universal switch command. Check your device’s CLI guide, supported rate range and unit conventions before using it. The command may not work on Cisco, Aruba or other switch families.
What If the Switch Supports Only Ingress Rate Limiting?
Some switches offer ingress rate limiting but do not provide a matching egress control on the same interface. In that case, configuring ingress alone may restrict uploads without applying the intended download limit.
Check the switch’s bandwidth-control capabilities before deployment. If the switch cannot limit both directions at the required level, you may need a model with the appropriate traffic-shaping or rate-limiting features.
For organisations that need bandwidth policies based on individual IP addresses, MAC addresses or user identities rather than physical ports, check whether the switch supports policy-based QoS or per-flow controls. A simple port limit is not the same as an individual-user policy.
Not sure which route fits you?
Tell us your stream and what you are hoping for, and we will tell you honestly which option suits.
Get course detailsHow to Verify Whether the 10 Mbps Limit Is Working
A good network configuration should be tested rather than assumed to be correct.
- Confirm that each selected computer is connected to the intended port.
- Verify that ingress and egress settings are enabled at the intended rate.
- Run download and upload tests separately on a restricted computer.
- Run a comparison test on an unrestricted computer.
- Review port counters, traffic statistics or rate-limit counters if available.
- Repeat the tests while the network is reasonably stable.
If a selected computer still receives higher speeds than expected, check the rate units, whether the configuration was saved, whether the feature controls all traffic or only certain traffic categories, and whether the test is measuring a different network path.
Students building practical network skills through a Cyber Security Course in Chennai can also benefit from understanding how bandwidth policies, access controls and network monitoring work together.
Common Mistakes to Avoid
1. Configuring only one traffic direction
Setting ingress to 10 Mbps does not necessarily limit downloads. Configure egress as well if the device supports it and both directions need to be restricted.
2. Applying the limit to the uplink port
The uplink connects the switch to another switch or router and may carry traffic for many computers. A 10 Mbps limit on that port can restrict the combined traffic of all connected users.
Apply the limit to the correct edge ports unless your network design requires a different policy.
3. Confusing storm control with bandwidth control
Storm control protects the network from excessive broadcast, multicast or unknown-unicast traffic. It does not normally set a 10 Mbps cap on all internet traffic.
4. Assuming every managed switch has the same features
Some models support only ingress limiting, some support both ingress and egress, and others provide additional traffic-shaping or policy-based controls. Always check the exact model and firmware.
5. Expecting exactly 10 Mbps in every speed test
The configured limit is not the same as a guaranteed application-level speed. Protocol overhead, congestion and measurement differences can affect the displayed result.
Understanding these details is useful when learning how network access, security policies and traffic controls work together. A practical Ethical Hacking Course in Chennai can help learners build broader knowledge of network behaviour and security testing.
Conclusion
To limit selected computers to 10 Mbps while allowing other systems to continue using the 100 Mbps internet connection, configure ingress and egress port rate limiting on the managed switch ports connected to those computers. Apply the settings, save the configuration and test upload and download speeds to confirm the result.
The most important point is to check the switch’s actual capabilities and identify the correct ports before applying any limit. Per-port rate limiting is suitable when each selected computer has its own configurable port; shared connections may require a different approach.
For readers who want to develop these networking skills through practical learning, explore the CCNA course in Chennai at Systech Group.
Frequently asked questions
Can I limit internet bandwidth without a firewall?
Yes. A managed switch that supports ingress and egress rate limiting can restrict traffic on selected ports without a firewall. However, this is a bandwidth-control feature, not a replacement for firewall security policies.
Can I limit only four computers while allowing the others to use 100 Mbps?
Yes, if each selected computer is connected to a separately configurable port. Set the desired limit on those ports and leave the others unchanged. The shared internet connection and network congestion can still affect every device.
Is 10 Mbps the same as 10 MB/s?
No. Mbps means megabits per second, while MB/s means megabytes per second. At the theoretical conversion rate, 10 Mbps equals 1.25 MB/s before accounting for protocol overhead.
Can I limit each computer separately if they connect to an unmanaged switch?
Not by setting a limit on the shared uplink alone. That would limit the combined traffic of all devices behind it. For individual limits, connect the computers to separately controlled ports or use supported per-device traffic policies.
Does bandwidth limiting improve network security?
Bandwidth limiting can help control excessive traffic use, but it does not by itself prevent malware, unauthorised access or network attacks. Use appropriate security controls alongside bandwidth management.
Which managed switch feature is used to limit bandwidth to 10 Mbps?
Use port-based rate limiting or bandwidth control to set a maximum traffic rate on the selected switch ports.
Can I limit bandwidth to 10 Mbps for specific IP addresses instead of switch ports?
Yes, if your network device supports IP-based QoS or traffic policies; otherwise, you may need a router or another device that supports per-IP bandwidth control.
Will limiting a switch port to 10 Mbps affect other computers on the network?
No, if each selected computer has its own port and the limit is applied only to those ports; a shared uplink limit can affect multiple computers.
How can I check whether a managed switch bandwidth limit is working?
Run download and upload speed tests on a restricted computer, compare the results with an unrestricted computer, and review the switch’s traffic counters if available.
Does every managed switch support 10 Mbps bandwidth limiting?
No, bandwidth control depends on the switch model, firmware and supported features, so check the manufacturer’s documentation before configuring the limit.