By Leo Antony Raj, Senior Trainer, Systech Group 20+ years in networking and cybersecurity · Updated November 2026.
6 Min read
In short
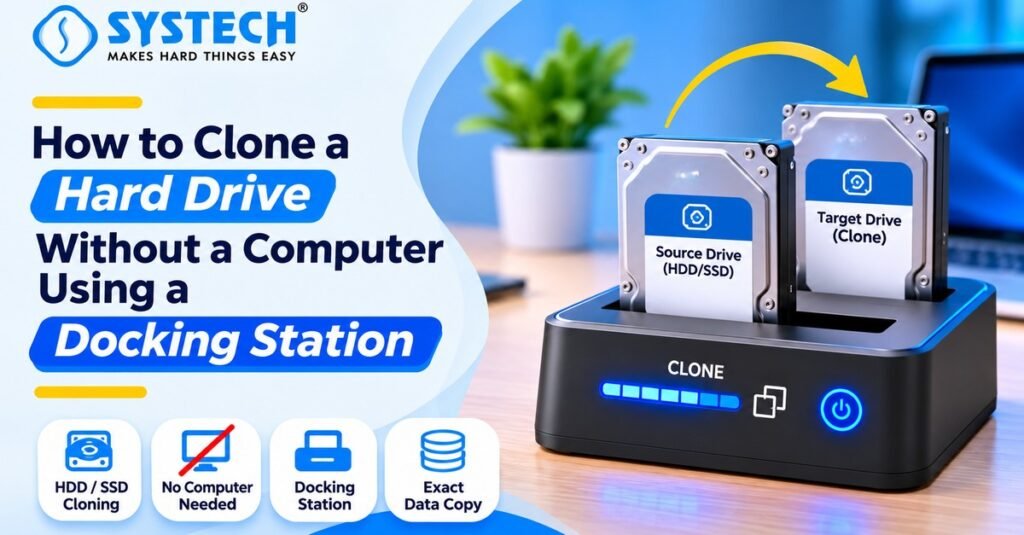
You can clone a hard drive without a computer by using a standalone dual-bay HDD/SSD docking station that supports offline cloning. Insert the original drive into the source bay and the replacement drive into the destination bay, check that both drives are compatible and that the destination meets the dock’s capacity requirement, then start the clone function using the device’s button. The dock copies data directly between the drives. Cloning normally overwrites the destination, so back up its data first. When the process finishes, connect the cloned drive to a computer and verify its partitions and files.
Table of Contents
Can You Clone a Hard Drive Without a Computer?
Yes. You can clone an HDD or SSD without connecting it to a computer if you use a standalone hard drive docking station or hardware duplicator with an offline cloning feature. The device copies data directly from the source drive to the destination drive using its built-in cloning function.
A typical dual-bay docking station has two slots. The original drive is placed in the source slot, and the replacement drive is placed in the destination slot. After checking compatibility and capacity, you start the cloning process using the button or control specified by the manufacturer. Progress LEDs or a display may indicate the copy status.
This method is useful when you want to replace an old drive, duplicate a disk for migration, or create a disk copy without running cloning software on a PC. However, not every docking station supports standalone cloning. Some docks only allow drives to connect to a computer over USB. Check the product specifications for the exact words “offline clone”, “standalone clone” or “hard drive duplicator” before buying.
What Is Offline Hard Drive Cloning?
Offline hard drive cloning is the process of copying the contents of one drive directly to another using a hardware duplicator. The cloning dock performs the operation independently, so a computer and cloning application are not needed during the copy. Understanding storage devices, computer components and hardware connections is also an important part of learning through a Hardware and Networking training institute in Chennai with practical lab sessions
The source drive contains the original data. The destination drive receives the copied data. Depending on the model and cloning method, the device may copy partitions and data sector by sector or use another supported duplication process. Follow the device manual because the exact behaviour varies.
How a Dual-Bay Dock Works
Source drive: the original HDD or SSD that contains the data to be copied.
Destination drive: the replacement or target drive that will receive the copy.
Docking station: provides the supported SATA connections, power and standalone cloning control.
Progress indicator: LEDs or a display show the cloning status according to the model.
Verification: after completion, connect the destination drive to a computer and check the copied data.
SOURCE DRIVE (SLOT A) → STANDALONE CLONING DOCK → DESTINATION DRIVE (SLOT B)
This is a simplified workflow based on the supplied brief. Slot labels and button sequences differ between docking station models.
What Do You Need Before Cloning?
The brief describes a dual-bay SATA docking station and 2.5-inch or 3.5-inch HDD/SSD support as common examples. This does not mean every dock supports all drive formats. In particular, an M.2 NVMe or M.2 SATA drive may require a different device. Check the exact product specification.
Check Drive Compatibility and Capacity
Compatibility is one of the most important checks before offline cloning. A drive may fit physically but still use an interface that the docking station does not support. Read the product manual and compare the drive labels or specifications. Learning about device interfaces, network hardware and system connectivity through a CCNA course in Trichy with hands-on Cisco lab training can help build a stronger technical foundation.
Interface and Form Factor
Destination Capacity
Many standalone cloning docks require the destination drive to have a capacity equal to or greater than the source drive. If the source is larger, the dock may refuse to start the operation or the copy may fail. Check the manufacturer’s stated capacity rule before connecting the drives.
Capacity labels can be confusing. Two drives marketed with similar capacity may report slightly different usable sizes. A target that appears to have the same advertised capacity may still be smaller in exact sector count. For a straightforward hardware clone, choosing a destination with a larger capacity than the source reduces this compatibility risk.
Also understand that a sector-by-sector clone may copy the entire source layout, including unused space. A smaller target may not work even if the used files would fit. Do not assume the dock will resize partitions automatically.
Understand Source and Destination Bays
Correct drive placement is essential. In the workflow described in the supplied brief, the source drive is inserted into Slot A and the destination drive into Slot B. Other products may use different labels or positions, so always follow the markings on the dock and the manufacturer’s manual.
Never guess which slot is the source. If the drives are placed in reverse order, the cloning operation may copy in the wrong direction and overwrite the original data. Confirm the source and target labels before powering on or pressing the clone button.
How to Clone a Hard Drive Using a Docking Station
The steps below explain the general offline cloning process. Button timing, LED patterns and startup order vary by manufacturer and model. The product manual takes priority over this general guide.
Step 1: Back Up the Destination Drive
Save any files you need from the destination drive to another safe location. Offline cloning generally overwrites the target drive’s existing contents. Do not continue if the destination contains data you have not backed up.
Step 2: Power Off the Dock
Disconnect the docking station from power before inserting or removing drives unless the manufacturer specifically states otherwise. Place the dock on a stable, dry surface and avoid touching exposed connectors.
Step 3: Insert the Source Drive
Insert the original HDD or SSD into the bay marked Source or Slot A, following the dock’s orientation guide. Ensure the drive is seated correctly and do not force it into the connector.
Step 4: Insert the Destination Drive
Insert the target drive into the bay marked Target or Slot B. Confirm again that the destination drive meets the capacity requirement and that it is the correct disk to overwrite.
Step 5: Connect Power
Connect the docking station’s supplied power adapter and switch it on according to the manual. Some models require the dock to be powered before the clone operation can be activated.
Step 6: Start the Offline Clone
Use the dedicated clone button or control sequence described by the manufacturer. Some devices require a press-and-hold action or a confirmation sequence. Do not copy a button sequence from another model; the controls are not universal.
Step 7: Monitor the Progress Indicators
Watch the LEDs or display to understand the progress. Some docks use percentage indicators such as 25%, 50%, 75% and 100%, while others use a different pattern. Read the manual to identify what each light means. A blinking indicator may represent activity, progress or an error depending on the product.
Step 8: Wait Until Completion
Do not remove either drive, switch off the dock or disconnect power while cloning is in progress. An interruption can leave the destination incomplete or unusable. Wait for the manufacturer’s completion indication before touching the drives.
Step 9: Power Down and Remove the Drives
After the dock indicates that cloning is complete, follow the manual’s shutdown and removal procedure. Allow the drives to stop before removing them.
Step 10: Verify the Destination Drive
Connect the cloned drive to a computer using a compatible SATA connection or USB-to-SATA adapter. Check that the expected partitions and files are present. If you cloned a boot drive, verify the system’s boot configuration and compatibility before relying on it as the replacement.
How to Verify the Cloned Drive
A completed LED sequence does not prove that every file or operating-system function is correct. Verification is an essential part of the process. Understanding operating systems, storage configuration and system troubleshooting is also covered in Hardware and Networking training in Coimbatore with practical computer hardware sessions.
Confirm that the computer detects the destination drive with the expected capacity.
Open the disk-management utility and review the partition layout.
Check that expected volumes and drive partitions are visible.
Open a sample of important files and folders to confirm that they can be read.
Compare key folder contents or file counts where practical.
If the drive contains an operating system, test booting only after confirming the hardware and boot-mode requirements.
Keep the original source drive unchanged until you are satisfied with the clone and have a separate backup.
If the cloned disk is not bootable, do not immediately repeat the clone. First check whether the original disk used UEFI or legacy BIOS boot, whether the destination is correctly connected, and whether the system supports the cloned drive. Some hardware duplicators copy data but do not adapt the operating system to a different computer.
Offline Docking-Station Cloning vs Software-Based Cloning
Both methods can copy one drive to another, but they work differently. Choose the method based on the drive type, destination capacity, partition requirements and the level of control you need.
Offline cloning is convenient when the dock supports both drives and the target meets its requirements. Software cloning may be preferable when you need to resize partitions, migrate to a smaller drive, exclude data or handle a more complex operating-system migration. Check the software’s supported filesystems and backup requirements before starting.
Not sure which route fits you?
Tell us your stream and what you are hoping for, and we will tell you honestly which option suits.
Get course detailsCommon Cloning Problems and Troubleshooting
If the source drive is failing and contains important data, repeated cloning attempts can make the situation worse. Consider professional data-recovery support rather than repeatedly powering a mechanically damaged drive. Learning practical troubleshooting techniques and understanding computer systems are important skills developed through Networking and Cybersecurity training in Chennai with practical technical sessions.If the source drive is failing and contains important data, repeated cloning attempts can make the situation worse. Consider professional data-recovery support rather than repeatedly powering a mechanically damaged drive.
Safety Precautions and Best Practices
Back up the destination drive before cloning because its existing data may be overwritten.
Confirm the source and target bays carefully before starting.
Check SATA interface, drive form factor and the dock’s supported capacity limits.
Use the power adapter supplied or specified by the manufacturer.
Keep the dock on a stable surface with adequate ventilation.
Do not remove drives or disconnect power during cloning.
Do not assume every dock supports M.2, NVMe, IDE or every SATA drive capacity.
Read the exact model’s LED and button instructions before starting.
Verify partitions and important files after cloning.
Keep the original source drive safely stored until the destination has been tested.
Maintain an independent backup; a clone is not a replacement for a regular backup strategy.
Frequently asked questions
Can I clone a hard drive without a computer?
Yes. Use a standalone dual-bay docking station or hardware duplicator that specifically supports offline cloning. The device copies directly from the source drive to the destination drive.
What is an offline hard drive cloning dock?
It is a hardware device that duplicates a supported drive to another drive without requiring a computer or cloning application during the copy.
Which slot should contain the original hard drive?
Follow the dock’s labels and manual. In the workflow described in this guide, the original source drive goes in Slot A and the destination drive goes in Slot B.
Does cloning erase the destination drive?
In most standalone cloning workflows, the destination drive is overwritten. Back up all important target data before starting.
Does the destination drive need to be larger than the source?
Many docks require the destination to be equal to or larger than the source. Check the exact model’s requirements; choosing a larger target can avoid capacity and sector-count issues.
Can I clone an HDD to an SSD without a PC?
Yes, if the docking station supports the source and destination drive types and its offline cloning function supports that combination. Verify the interface and capacity rules first.
Can I clone an SSD without a computer?
Yes. A compatible standalone duplicator can clone supported SATA SSDs. Do not assume a standard SATA dock supports M.2 SATA or NVMe SSDs.
How do I know when cloning is complete?
Use the LED or display indicators explained in the manufacturer’s manual. Wait for the specified completion state before powering down or removing the drives.
Will the cloned drive boot automatically?
Not always. Bootability depends on the source disk layout, firmware mode, hardware compatibility and the cloning method. Verify the partitions and boot configuration on the target computer.
Is offline cloning better than software cloning?
Neither is always better. Offline cloning is convenient for supported drive-to-drive copies. Software cloning provides more control for tasks such as partition resizing or complex migrations.
Learn Hardware and Networking with SYSTECH Group
Hard drive installation, storage devices, operating systems and data migration are important parts of hardware and system administration. Building a strong foundation in computer hardware and networking helps learners understand how storage devices connect, how systems boot and how to troubleshoot common hardware issues. Students interested in developing these skills can explore Hardware and Networking training in Trichy with practical computer hardware training.
Final Thoughts
Hard drive cloning without a computer is possible with a standalone dual-bay docking station that supports offline cloning. The process is straightforward: place the original drive in the source bay, place the destination drive in the target bay, confirm compatibility and capacity, start the clone function and wait for the completion indicator.
The most important precautions are to back up the target, confirm the bay positions, use compatible drives, avoid interrupting power and verify the copied partitions and files afterwards. Always follow the exact docking station manual because supported drive types, capacity rules, button sequences and LED meanings vary by model.
Written by
Leo Antony Raj
Senior Trainer · Networking, Cyber Security and Cloud
Leo Antony Raj has over 20 years of hands-on experience in hardware, networking, server configuration, ethical hacking and cloud computing. He has trained more than 10,000 students, and he teaches networking first, because every security and cloud role is built on it.