By Leo Antony Raj, Senior Trainer, Systech Group 20+ years in networking and cybersecurity · Updated November 2026.
6 Min read
In short
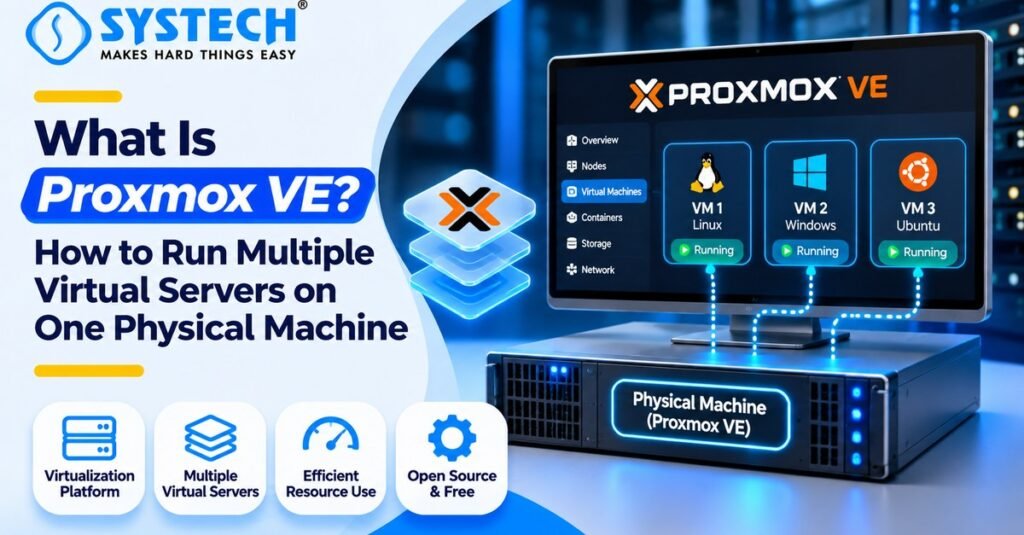
Proxmox VE (Proxmox Virtual Environment) is an open-source server virtualisation platform that lets you run and manage multiple virtual machines and Linux containers on one physical server. It combines KVM for full virtual machines and LXC for lightweight Linux containers. Administrators manage the host, guests, storage and networking through a browser-based interface. With suitable CPU, RAM, storage and network capacity, one server can host separate workloads such as Windows, Linux, a firewall and a PBX.
Table of Contents
Why Run Multiple Servers on One Physical Machine?
A business, training lab or IT team may need different systems for different tasks. One machine might be required for a Windows server, another for Linux services, another for firewall testing and another for a PBX or VoIP environment. Traditionally, each workload could require its own physical computer. That approach increases hardware cost, power use, cabling, space and maintenance.
Server virtualisation provides another approach. A hypervisor divides the physical server’s available computing resources into separate virtual environments. Each environment can run its own operating system or supported workload while sharing the host’s CPU, memory, storage and network interfaces.
For example, a single sufficiently powerful server can host:
A Windows virtual machine for Windows Server administration practice.
A Linux virtual machine for web services, scripting or network tools.
A firewall virtual machine for routing, segmentation and security exercises.
A PBX virtual machine for learning IP telephony and call routing.
One or more Linux containers for lightweight services such as DNS, monitoring or an internal application.
This does not mean that one physical server has unlimited capacity. Every guest consumes resources, and all guests depend on the physical host. If the host fails, the virtual workloads running on it may all become unavailable. Resource planning, backups and recovery procedures are therefore essential.
What Is Proxmox VE and How Does It Work?
Proxmox VE stands for Proxmox Virtual Environment. It is an open-source server virtualisation platform designed to install directly on compatible physical hardware. It provides a central management environment for virtual machines, containers, storage, networking, users, backups and other host resources. Understanding server installation, configuration and administration also builds a strong foundation through Windows Server training in Trichy with practical Hyper-V virtualisation labs.
Proxmox VE combines two important technologies:
- KVM (Kernel-based Virtual Machine) provides hardware-assisted full virtualisation. A KVM virtual machine can run a separate guest operating system, such as Windows or a Linux distribution.
- LXC (Linux Containers) provides operating-system-level virtualisation for Linux workloads. Containers share the host’s Linux kernel while keeping their processes, filesystems and resource settings isolated.
- After installation, an administrator normally connects to the Proxmox web interface from another computer on the management network. From the browser, the administrator can create and start guests, open consoles, allocate resources, configure virtual networks, inspect task history and review resource usage.
The diagram is a simplified conceptual view. The exact network and storage design depends on the server, guest requirements and deployment goals.
Proxmox VE vs Traditional Desktop Virtualisation
Desktop virtualisation tools usually run as applications inside an existing desktop operating system. Proxmox VE is normally installed directly on the physical server as the host platform. This bare-metal approach allows the machine to be managed as a dedicated virtualisation host rather than as a normal desktop computer. Learners interested in virtual infrastructure and cloud environments can explore cloud computing training in Trichy covering virtualisation and infrastructure concepts.
A desktop hypervisor can still be useful for testing Proxmox VE inside a nested virtual machine, provided the underlying platform supports nested virtualisation. For a dedicated host, however, bare-metal installation is the normal approach.
Virtual Machines vs LXC Containers
Choosing between a virtual machine and a container is one of the most important Proxmox VE decisions. Both create separate environments, but they do not provide isolation in the same way.
Example: use a KVM virtual machine when you need to practise Windows Server administration or run a firewall appliance that expects its own operating system. Use an LXC container for a lightweight Linux service when the application is compatible with the host kernel and container restrictions.
Containers are not simply smaller virtual machines. Because they share the host kernel, kernel-level requirements and security boundaries differ. A container should not be treated as an independent Windows or Linux kernel installation.
Hardware Requirements and Resource Planning
The number of virtual machines or containers a server can run depends on the workload, not just the product name. A small lab running two lightweight Linux guests has very different requirements from a host running several Windows servers, a firewall and a PBX at the same time. Understanding how cloud platforms allocate computing, storage and network resources is also useful through AWS training in Chennai with practical cloud infrastructure deployment.
The official Proxmox requirements distinguish evaluation hardware from recommended production hardware. The published guidance identifies a 64-bit Intel/AMD CPU with Intel VT or AMD-V support for x86 KVM virtualisation, at least 2 GB of memory for the host and Proxmox services plus memory for guests, fast storage, and suitable network interfaces. ZFS or Ceph deployments require additional memory. Treat minimum evaluation figures as testing guidance, not as a production sizing target.
A Simple Resource Allocation Example
The following is an illustrative learning-lab example, not a universal sizing recommendation. Assume a host with 8 CPU cores, 32 GB RAM and SSD storage. The administrator might begin with a modest allocation and adjust after monitoring real usage.
These allocations are starting examples only. Guest operating-system requirements, concurrent activity, storage performance and the hypervisor’s actual overhead all matter. Monitor CPU, memory, disk latency and network utilisation before increasing the number of guests.
How to Install Proxmox VE
For most new users, the recommended method is to download the official Proxmox VE ISO and install it on dedicated hardware. The installer includes the required base operating system and Proxmox packages.
Before You Begin
Choose a dedicated physical server or compatible computer. The selected installation disk will be used by the installer.
Back up important files from the target disk. The bare-metal installation process can erase existing data on the selected drive.
Check CPU virtualisation support in the system firmware. Enable Intel VT-x or AMD-V where required.
Plan the management IP address, subnet mask, gateway, DNS server and hostname.
Download the current Proxmox VE ISO from the official website and create bootable USB installation media.
Use a reliable network connection and a monitor/keyboard or remote console for the initial installation.
Installation Overview
Boot the server from the prepared USB installation media.
Choose the Proxmox VE installation option and review the licence and installation prompts.
Select the target disk and the appropriate filesystem/storage layout for your hardware and needs.
Set the country, time zone and keyboard layout.
Create a strong administrator password and provide a valid email address for system notifications.
Configure the management network, including hostname, IP address, gateway and DNS.
Review the summary and start the installation. Confirm that the selected disk can be overwritten.
After installation completes, reboot the server and remove the installation media when prompted.
Access the Proxmox Web Interface
After the host starts, identify the management IP address configured during installation. From a computer that can reach that network, open a modern browser and enter the host address using HTTPS and port 8006, for example: https://192.168.1.50:8006. Replace the example address with the IP assigned to your own server.
Sign in using the administrator account created during installation. A browser certificate warning may appear when the host uses its default self-signed certificate. Verify that you are connecting to the correct host and use an appropriately trusted certificate for production environments.
The web interface presents the server and its resources in a central navigation view. The exact layout can vary between Proxmox VE releases, so follow the documentation for the installed version when a menu or setting differs.
Create Your First Virtual Machine and LXC Container
Create a KVM Virtual Machine
Upload or select an installation ISO using the storage area configured for ISO images.
Select the Proxmox node and choose Create VM.
Enter a clear VM ID and name, such as linux-lab or windows-server-lab.
Choose the installation ISO and the correct guest operating-system type.
Configure the virtual disk, selecting storage with enough free capacity.
Assign CPU cores and memory based on the guest OS requirements and host capacity.
Select the virtual network bridge that should connect the VM.
Review the settings and create the VM.
Open the VM console, start the guest and complete its operating-system installation.
Install the appropriate guest tools or drivers where required, then apply operating-system updates.
Do not allocate every host CPU core or all available RAM to one guest. Start with a sensible allocation, test the workload and adjust after reviewing actual usage.
Create an LXC Container
Download a supported Linux container template through the Proxmox interface or use a template already available in configured storage.
Choose Create CT and enter a container ID, hostname and a strong password or supported authentication method.
Select the Linux template and configure the root filesystem size.
Assign CPU and memory limits appropriate to the service.
Configure the network interface, IP address or DHCP option, gateway and DNS.
Review the container settings and create it.
Start the container and use its console or a secure management method to install and configure the required service.
Use unprivileged containers where possible for a safer default isolation model. Some applications require additional container features or device access; review the security impact before enabling them.
Configure Proxmox VE Networking and Storage
Networking Basics
Proxmox VE commonly uses Linux bridges to connect virtual machines and containers to physical network interfaces or to other virtual networks. A bridge behaves like a virtual switch. A guest connected to a bridge can communicate with other devices according to the bridge, VLAN, routing and firewall configuration. Building these networking fundamentals is an important part of CCNA training in Chennai covering routing, switching and network configuration.
Management network: carries access to the Proxmox host and its web interface. Restrict access to trusted administrator devices or networks.
Guest network: connects VMs and containers to the required LAN or lab segment.
Isolated lab network: keeps test traffic separate from the home or office network when the lab involves firewall, malware-analysis or security exercises.
VLANs: allow logical network separation when the physical switch, NICs and Proxmox configuration are designed to support VLAN tagging.
Do not assume that creating a separate VM automatically isolates it from every other network. Review bridge membership, VLAN tags, routing, firewall policies and the physical switch configuration.
Storage Basics
Proxmox VE can work with different storage types, depending on the deployment. Common choices include local directory storage, LVM-thin, ZFS, network shares and shared storage. Each has different capabilities, operational requirements and trade-offs.
A snapshot is useful for returning a guest to an earlier state, but it is not a substitute for an independent backup. A storage failure or host incident can affect both the original guest and snapshots stored on the same device.
Build a Practical Networking and Cybersecurity Lab
A Proxmox VE homelab can help learners practise networking, system administration and cybersecurity concepts without needing a separate physical server for every role. The following is an example topology based on the brief’s suggested firewall, Linux server, Windows VM and PBX workloads. Learners who want additional practical experience with server deployment and administration can explore Windows Server training in Coimbatore with hands-on server and virtual machine practice.
Suggested Logical Network Plan
These private subnets are examples only. Check that they do not overlap with the existing office, home or VPN networks before using them. Configure routing and firewall rules deliberately; do not expose the management interface or lab services to the public internet simply to make remote access easier.
Example Learning Workflow
Create the firewall VM and connect its virtual interfaces to the intended WAN and lab bridges.
Create separate lab networks for server, security and voice workloads.
Deploy a Linux VM and a Windows VM on the server lab network.
Deploy the PBX VM on the voice lab network and keep its management access restricted.
Configure only the routes and firewall rules required for the exercise.
Test connectivity between approved systems and confirm that blocked paths remain blocked.
Monitor resource usage while starting multiple guests and running the lab exercises.
Document the network diagram, IP addresses, credentials-handling process and changes made.
Keep experiments inside networks and systems you own or are authorised to test. A lab firewall should not be bridged into a production network without a reviewed design and explicit approval.
Not sure which route fits you?
Tell us your stream and what you are hoping for, and we will tell you honestly which option suits.
Get course detailsMonitor, Snapshot and Back Up Your Workloads
A virtualisation host needs regular monitoring because a single physical resource bottleneck can affect several guests at once. Use the Proxmox interface and appropriate guest-level tools to review:
CPU utilisation and whether one guest is consuming a disproportionate share.
Memory use, swapping and whether the host has enough free memory for normal operation.
Storage capacity, thin-pool usage, disk latency and available backup space.
Network throughput, errors and unexpected traffic between virtual networks.
Guest availability, service health and recent task or system logs.
Snapshots can be useful before a planned configuration change, software update or lab experiment. If the change causes a problem, a snapshot may provide a convenient rollback point, subject to the storage and guest configuration.
Backups should be scheduled separately and stored on a different failure domain where possible. For example, use a separate backup server or suitably protected network storage rather than keeping the only backup on the same physical disk as the VM. Test restore procedures periodically; an untested backup may not meet recovery needs.
For important services, define recovery objectives: how much data loss is acceptable, how quickly the service must return, who performs restoration and where recovery copies are stored.
Security and Maintenance Best Practices
Keep Proxmox VE and guest operating systems updated through the supported update process for the installed release.
Use strong, unique administrator credentials and enable multi-factor authentication where supported and appropriate.
Create named user accounts and assign only the permissions each administrator needs.
Restrict access to the management interface to trusted networks; avoid exposing port 8006 directly to the public internet.
Configure host, guest and network firewalls with least-privilege rules.
Use secure remote-access methods, such as a properly configured VPN, rather than exposing management services unnecessarily.
Use trusted repositories and understand the repository/subscription configuration before applying updates.
Store backups separately, protect backup access and test restoration.
Review logs, authentication activity, storage health and hardware alerts.
Document changes to bridges, VLANs, firewall policies, storage pools and guest resource allocations.
A virtual machine is not automatically safe because it is isolated. Misconfigured bridges, permissive firewall rules, shared credentials, exposed management ports or unsafe passthrough settings can create pathways between environments. Treat the hypervisor as critical infrastructure and protect it accordingly.
Common Proxmox VE Problems and Troubleshooting
Change one variable at a time when troubleshooting. Record the original configuration before modifying a bridge, storage pool or firewall rule. For production systems, follow a change-control and recovery process.
Frequently asked questions
What is Proxmox VE used for?
Proxmox VE is used to manage virtual machines and Linux containers on physical servers. It is suitable for homelabs, training environments and appropriately designed production infrastructure.
Is Proxmox VE free to use?
Proxmox VE is open-source software and can be downloaded and used without purchasing a licence. Paid subscription options provide access to enterprise repository channels and support services; check the official website for current terms.
Can I run Windows and Linux on the same Proxmox server?
Yes. You can run supported Windows and Linux operating systems as separate KVM virtual machines, provided the physical server has sufficient CPU, memory, storage and compatible hardware.
What is the difference between a Proxmox VM and an LXC container?
A KVM VM runs a separate guest operating system and kernel. An LXC container runs a Linux userspace while sharing the host Linux kernel, so it is generally lighter but has different compatibility and isolation characteristics.
How much RAM do I need for Proxmox VE?
The host needs memory for Proxmox VE services, and every guest needs additional memory. The right amount depends on the operating systems and workloads. The official requirements list a minimum for the host and recommend adding memory for guests; production sizing should be based on workload testing.
Can I install Proxmox VE on a normal desktop PC?
It may be possible to install Proxmox VE on compatible desktop hardware, provided the CPU, motherboard, storage and network hardware are supported. The normal bare-metal installation uses the selected disk, so back up data first.
Can I manage Proxmox VE from a web browser?
Yes. Proxmox VE provides a browser-based management interface. Administrators connect to the host over HTTPS using its configured IP address and management port.
Can Proxmox VE run a firewall and PBX on one server?
Yes, as separate virtual machines when the hardware and network design support them. Plan virtual NICs, bridges, routing, firewall policies and resource allocations carefully, and isolate lab workloads from production networks.
Are Proxmox snapshots the same as backups?
No. Snapshots capture a point-in-time state for supported storage and guest configurations, while backups create recovery copies. Keep independent backups on separate storage and test restoration.
Is Proxmox VE suitable for a beginner networking lab?
Yes. It can provide separate environments for Windows, Linux, firewall and PBX practice on one physical server. Beginners should start with a small isolated lab, learn bridges and resource allocation, and expand after testing.
Learn Networking and System Administration with SYSTECH Group
Understanding virtualisation becomes easier when you combine theory with practical server, networking and security exercises. Build your foundation in operating systems, IP networking, routing, switching, network security and infrastructure administration, then apply those concepts in a controlled virtual lab.
Final Thoughts
Proxmox VE makes it possible to run multiple virtual servers on one physical machine by combining KVM virtual machines, LXC containers and central browser-based management. It can help learners practise Windows, Linux, firewall, PBX and networking tasks without maintaining a separate physical computer for every workload.
A successful setup depends on more than installing the platform. Plan CPU, memory, storage and network capacity; choose VMs or containers according to the workload; separate management and lab traffic; monitor resource use; and maintain independent backups. Start with a small lab, test each component and expand only when the host has enough capacity.
Written by
Leo Antony Raj
Senior Trainer · Networking, Cyber Security and Cloud
Leo Antony Raj has over 20 years of hands-on experience in hardware, networking, server configuration, ethical hacking and cloud computing. He has trained more than 10,000 students, and he teaches networking first, because every security and cloud role is built on it.