Table of Contents
Introduction
Node.js and Express are powerful tools that simplify web application development. A standout feature of Express is its routing system, which lets you define how your app responds to HTTP requests. Routers take this a step further by allowing you to modularize your routes into separate files, making your codebase cleaner, more maintainable, and scalable. In this guide, we’ll walk through how to create and import routers in Node.js and Express, step by step.

What Are Routers in Node.js and Why Use Them?
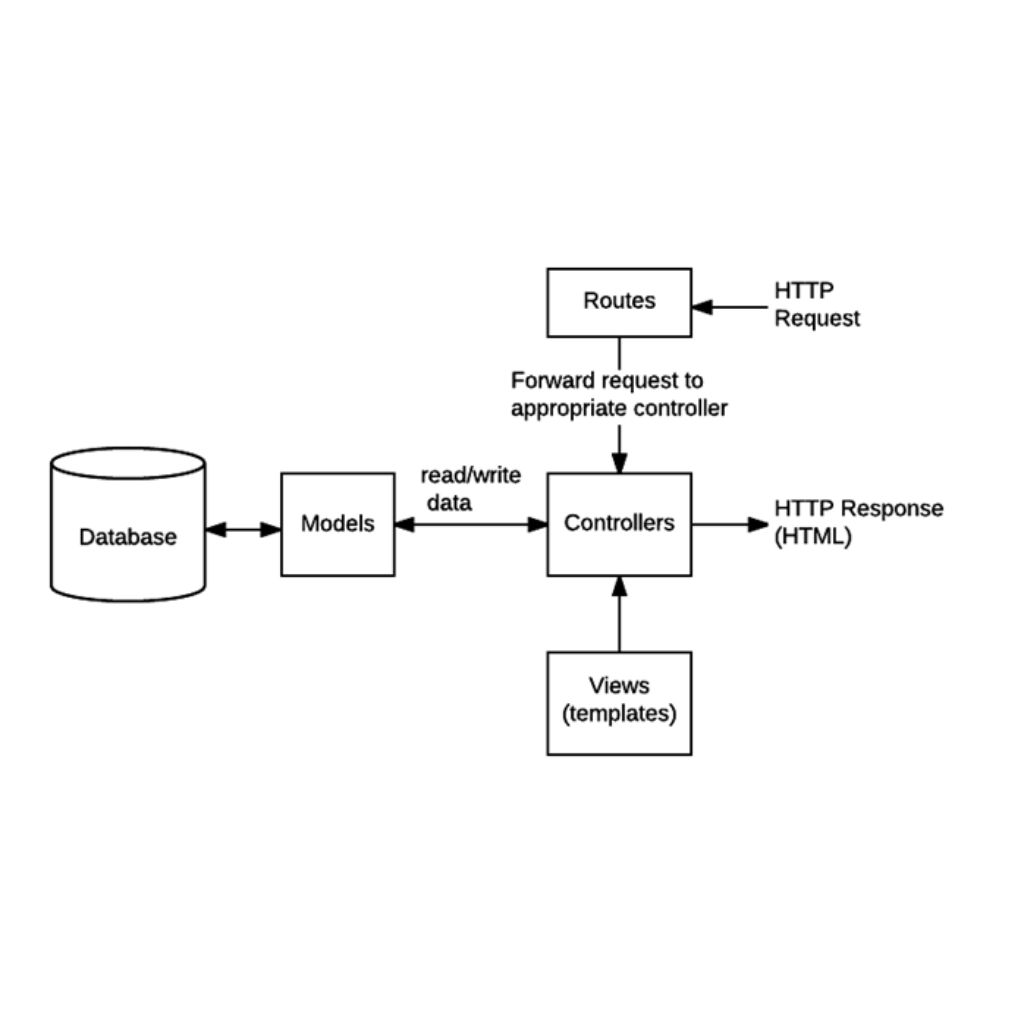
Routers in Node.js, particularly with Express, are mini-applications that handle specific subsets of routes. Instead of cramming all your routes into one file, you can split them into logical groups—like user routes (/users) or product routes (/products). This modularity enhances organization and makes it easier to manage large applications.
How to Create a Router in Node.js and Express
Creating a router is straightforward and essential for keeping your project structured. Here’s how to do it:
Step 1: Set Up Your Node.js Project
Ensure Node.js is installed, then create and initialize a project:
					mkdir my-node-app
cd my-node-app
npm init -y
Step 2: Install Express
Install Express, the web framework that powers routing:
npm install express --save
Step 3: Create a Router File
					// routes/myRouter.js
const express = require('express');
const router = express.Router();

// Define routes
router.get('/', (req, res) => {
    res.send('Hello, World!');
});

module.exports = router;
Step 4: Define Routes
Add specific routes to your router file. For example:
					// routes/myRouter.js
const express = require('express');
const router = express.Router();

router.get('/', (req, res) => {
    res.send('Hello, World!');
});

router.get('/:id', (req, res) => {
    res.send(`Item ID: ${req.params.id}`);
});

module.exports = router;
Step 5: Use the Router in Your Application
					// app.js
const express = require('express');
const app = express();
const myRouter = require('./routes/myRouter');

app.use('/api', myRouter); // Mounts router at /api

app.listen(3000, () => {
    console.log('Server running on port 3000');
});
How to Import a Router in Node.js
Importing a router is just as simple and builds on the creation process:
Step 1: Ensure a Router Exists
Follow the steps above to create a router if you haven’t already.
Step 2: Import and Mount the Router
In your main app file, require the router and use it:
					// app.js
const express = require('express');
const app = express();
const myRouter = require('./routes/myRouter');

app.use('/api', myRouter); // Routes prefixed with /api

app.listen(3000, () => {
    console.log('Server running on port 3000');
});
How to Organize Multiple Routers
For larger apps, you’ll likely need multiple routers. Here’s how to manage them:
Step 1: Create Additional Routers
Example: routes/users.js and routes/products.js:
					// routes/users.js
const express = require('express');
const router = express.Router();

router.get('/', (req, res) => {
    res.send('User list');
});

module.exports = router;
					// routes/products.js
const express = require('express');
const router = express.Router();

router.get('/', (req, res) => {
    res.send('Product list');
});

module.exports = router;
Step 2: Import and Mount in the Main App
					// app.js
const express = require('express');
const app = express();
const userRouter = require('./routes/users');
const productRouter = require('./routes/products');

app.use('/users', userRouter);
app.use('/products', productRouter);

app.listen(3000, () => {
    console.log('Server running on port 3000');
});
Enhancing Routers: Middleware and Error Handling
					router.use((req, res, next) => {
    console.log('Request received');
    next();
});
					router.use((err, req, res, next) => {
    res.status(500).send('Something went wrong!');
});
Common Questions About Routers
- What’s the difference between app.use() and router.get()?
app.use() mounts middleware or routers for all HTTP methods, while router.get() defines a route for GET requests only. - Can I nest routers?
Yes! Mount one router inside another using router.use() for deeper route hierarchies.
Conclusion
Routers in Node.js and Express are indispensable for building organized, scalable web applications. By creating modular routers and importing them into your project, you can keep your codebase clean and manageable. Whether you’re defining a single router or managing multiple ones, the steps in this guide will set you up for success in building robust applications with Node.js and Express.
Related Courses
FAQs
What is the purpose of using routers in Express?
Routers help modularize route handling by grouping related routes into separate files, making the codebase cleaner, easier to maintain, and more scalable.
How do I create a router in Express?
You can create a router using express.Router(), define routes inside it, and export the router module. Then, import and use it in your main app.js file.
Can I use middleware with routers?
Yes, middleware can be applied to routers using router.use(). This is useful for tasks like authentication, logging, or request validation for specific route groups.
How do I handle errors in a router?
You can define an error-handling middleware in the router using:
router.use((err, req, res, next) => {
res.status(500).send(‘Something went wrong!’);
});
Can I have nested routers in Express?
Yes, routers can be nested using router.use(). This allows you to organize routes into a structured hierarchy for better manageability.

